
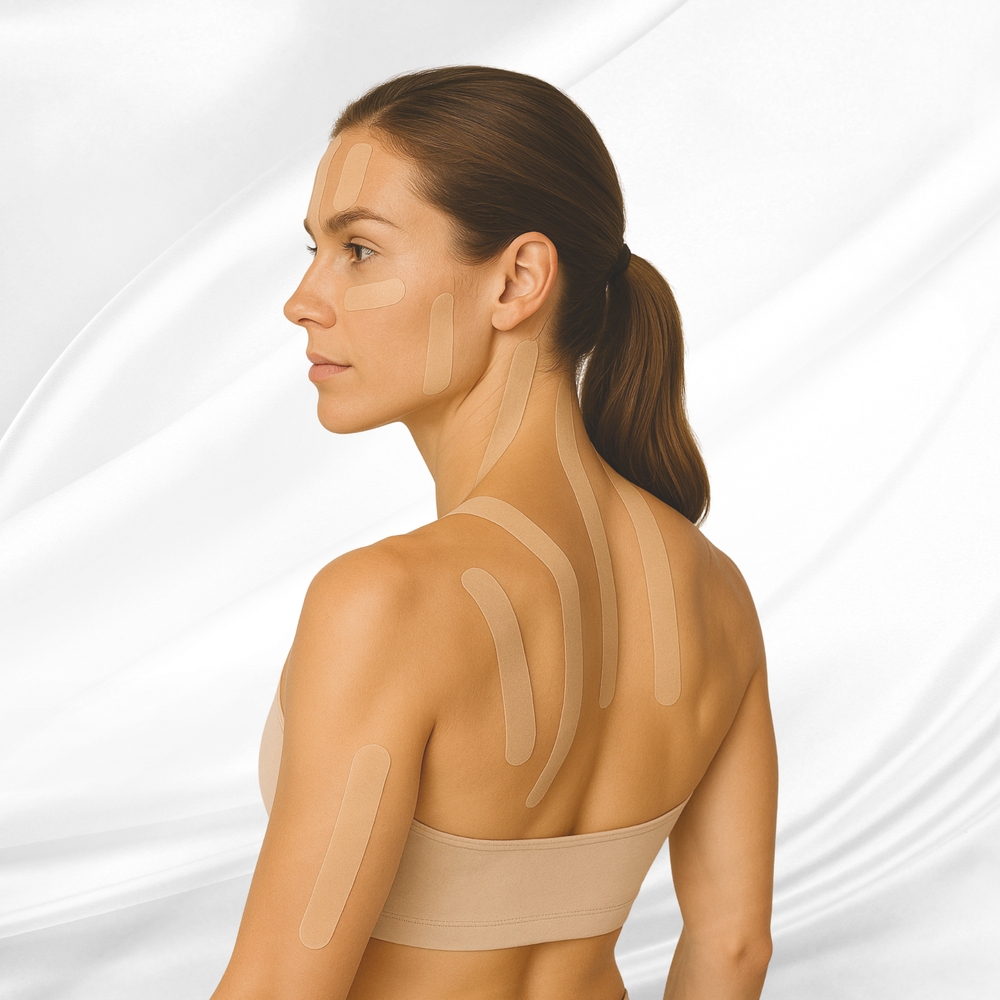
1. Introduction to Kinesiology Tape
Kinesiology tape is a highly versatile tool used in sports medicine, physical therapy, and rehabilitation. Its distinguishing feature is its elasticity, which sets it apart from traditional non-elastic tapes. This unique elastic property allows the tape to move with the body, offering support without restricting motion. Commonly available in widths of around 5 cm, kinesiology tapes are typically made from cotton, and less frequently from nylon, designed to replicate the elasticity of human muscles, with an extension capacity of 130–140%.
What makes kinesiology tape so effective is its combination of self-adhesive, breathable, water-repellent, and skin-friendly properties. The tape adheres to the skin using a thermoplastic acrylate adhesive, applied in wavy lines, which enhances both comfort and durability. Users can wear kinesiology tape for several days, even up to two weeks, without losing its supportive effect, making it suitable for athletes, fitness enthusiasts, and anyone needing long-term support.
Although there are many brands and variations of kinesiology tape, most share these fundamental characteristics, providing reliable support for muscles and joints, aiding in injury recovery, and improving movement efficiency. However, it is important to note that kinesiology tape is not a cure-all and should not replace professional medical treatment. Always consult a healthcare provider before using it for injury or rehabilitation.
Color Psychology and Kinesiology Tape
Kinesiology tape is available in a wide range of colors, from cool tones like blue to warm hues such as yellow. While the psychology of color suggests that different colors might evoke specific emotional or physiological responses, it is important to clarify that no scientific evidence supports the notion that the color of kinesiology tape has any effect on the healing process or the user’s mood. Any perceived impact of color on the human body or psyche remains anecdotal and unverified.
Contraindications and Safety Considerations
Despite its widespread use, kinesiology tape is not appropriate for everyone. Avoid kinesiology tape if you experience any of the following:
- Allergies to polyacrylic, acrylic, or acrylate adhesives (plaster allergy)
- Malignant tumors or cancer treatments such as radiation or chemotherapy
- Fresh skin injuries, open wounds, or chronic skin conditions like psoriasis, eczema, or fungal infections
- Vascular pathologies such as fresh thrombosis or varicose veins
- Use of blood-thinning medications or corticosteroids
- Recent sunburn, skin irritation, or unknown fever
- Sensitive skin, very loose connective tissue, or fractures not yet fully healed
- Pregnancies, particularly during the first trimester or for high-risk pregnancies
Furthermore, prolonged or continuous use without breaks is discouraged. Over-reliance on the tape’s supportive properties can lead to muscles, tendons, and joints becoming dependent on the external stimulus, potentially causing long-term damage.
2. How to Apply Kinesiology Tape
Preparation
- Prepare the skin: ensure the area is clean and dry — free of oils, lotions, perfumes, or creams.
- Trim or remove excess hair: improves adhesion and makes removal more comfortable.
- Cut the tape to the required length: measure first, then cut.
- Round the corners: prevents edges from lifting prematurely.
- Apply the ends (base) without stretching: the ends should always be applied with no tension.
Application
Once the base is secured:
- For minimal tension: apply the tape with no additional stretching, smooth onto the skin.
- For maximum tension: firmly pull the tape with both hands to create the desired stretch. Secure the stretched section while holding the base steady. Rub the tape for a few seconds to activate the thermoplastic adhesive.
- Tear the backing paper: remove small sections as you apply, not all at once.
Removing the Tape
Best removed when the tape is wet (e.g., in the shower):
- Wet the tape thoroughly — moisture loosens the adhesive.
- Peel off gently in the direction of hair growth.
Additional Tips
- Avoid touching the adhesive surface
- Firmly press down once applied
- Be cautious in sensitive areas (back of knee, neck, fingers, toes)
- Monitor for allergic reactions — if redness or burning, remove immediately
- Tingling when first applied is normal
- Replace after one week
- Remove slowly and gently
3. Application Examples
3.1 Beauty: Face Tape
CrossCat BeautyTape
Crafted with Premium Rayon (artificial silk) for an incredibly soft and gentle feel, ideal for sensitive skin. Features extra-strong adhesive for a longer-lasting hold. Available in a natural skin tone.
Face Tape for Beginners
- Prepare your skin: clean face, remove oils and makeup, ensure skin is dry.
- Cut the tape: 1–2 inches depending on the area.
- Position the tape: gently pull back the skin where you want to lift, place at an angle for best lift.
- Apply with gentle pressure: press down firmly but gently, smoothing out to avoid wrinkles or air bubbles.
- Remove carefully: slowly from the edges. Use gentle oil if needed to loosen adhesive.
Face Tape for Forehead Wrinkles
- Clean and prep the skin: cleanse forehead, ensure completely dry.
- Cut the tape: approximately 2–3 inches long.
- Apply the tape: gently pull forehead skin taut, position tape horizontally above the brow line for lifting effect.
- Press down firmly: smooth from center toward edges to eliminate air bubbles.
- Leave on for a few hours or overnight, then gently remove starting from one end.
Face Tape for Lips
- Prepare the lips: cleanse, remove makeup, oils, or balms. Ensure skin is dry.
- Cut the tape: about 1–2 inches, not too wide.
- Position the tape: press lips together for a smooth surface. Place vertically on upper lip to enhance volume, or horizontally on corners to lift.
- Press down gently: ensure adhesion, no wrinkles or air bubbles.
- Remove carefully after a few hours. Apply soothing lip balm afterward.
Face Tape for Jowls and Cheeks
- Clean the skin: remove oils or makeup. Ensure completely dry.
- Cut the tape: two pieces, each about 2–4 inches long.
- Apply the tape: looking in the mirror, gently pull cheeks and jowls upward. Place tape on jowls directing toward ears for a lifting effect.
- Smooth and secure: press firmly from center outwards to eliminate air bubbles.
- Remove gently after a few hours or overnight. Follow up with moisturizer.
3.2 Beauty: Boob Tape
- Prepare the skin: clean chest area, remove oils, lotions, and makeup. Completely dry.
- Measure and cut the tape: approximately 20–30 cm long depending on desired lift.
- Position the tape: start at the lower part of the breast. Pull tape upward and outward with slight stretch for desired lift.
- Secure the ends: press firmly, smooth from center toward edges. Repeat on other side if desired.
- Test the fit: wear a fitted top to check positioning. Adjust if necessary.
3.3 Sport Applications
Neck and Shoulders
- Measure tape from shoulder to hairline on the neck.
- Stretch the muscle by tilting head to opposite side and rotating toward same side.
- Apply base of tape at the hairline without stretching, directing toward shoulder joint.
- Apply rest of tape with no tension, with muscle fully extended.
- Repeat on other side if necessary.
Lower Back
- Flex spine by bending forward to stretch the area.
- Apply first tape strip horizontally over lumbar spine with maximum tension, leaving ends unstretched.
- Place second strip at right angle to first, also with maximum tension.
- Apply two remaining strips diagonally across first two, forming a star shape.
- Ensure all tape ends are attached without tension.
Knees
- Measure tape to 20–25 cm length.
- Apply tape to bent thigh.
- Stretch tape to maximum and apply along side of knee, leaving ~2 cm at ends unstretched.
- First tape outer side, then apply tape to inner side.
- Ensure all tapes are securely attached.
Elbows (Tennis or Golfer’s Elbow)
- Measure three tapes with hand turned inward and elbow extended.
- Apply base of tape on back of hand, between second and third metacarpal bones, ends unstretched.
- Slightly bend elbow and apply two short tape strips crossing each other directly over point of pain, with maximum tension.
- Ensure ends of both tapes are attached without tension.
Quads
- Measure tape while muscle is fully stretched, bending forward and extending knee.
- Apply base of tape at fibula head without stretching.
- Apply rest of tape over muscle toward ischial tuberosity (sit bone), without tension.
- Rub tape gently to ensure proper adhesion.
- Verify application is smooth and securely attached.
Feet and Ankles
- Measure tape lying face down with forefoot raised as much as possible, from heel to tendon transition.
- Position foot at 90° angle (zero position) between lower leg and foot.
- Attach base of tape to heel without stretching.
- With muscle fully extended, apply tape with maximum tension over tendon toward muscle attachment.
- Ensure end is applied without tension and tape is properly secured.
Big Toes
- Begin with foot at rest.
- Apply base of I-tape on inside of calf, wrap around foot with minimal tension.
- Apply second strip below metatarsal bone (upper foot) and wrap around foot to stabilize ankle.
- For first Y-tape: start at the big toe.
- Apply lower strip with tension toward ankle, finish without tension near Achilles tendon.
- Apply upper strip of Y-tape over lower one, with less tension on skin.
- To stabilize valgus: apply another Y-tape starting at ball of foot, wrapping around valgus with tension, finishing with less tension over top of foot.
Lower Abdomen (Pregnancy)
- Apply tapes the day before menstruation disorders begin.
- Place base of first tape centered above the buttocks gap on sacrum to the right.
- Apply second tape starting from beginning of first tape, positioned diagonally upward on opposite side of sacrum.
- Tape middle of third tape in midline of body between navel and pubis. Pull ends horizontally toward iliac crest on both sides.
- Cut fourth tape into Y-shape. Pull ends with low strain to right and left, reaching toward navel.
Calves and Achilles Tendons
- Measure tape in prone position with forefoot lifted, from heel to where tendon crosses calf muscles.
- Hold foot in zero position (90° angle between lower leg and top of foot).
- Attach base of Y-tape to heel without stretching.
- Stretch two parts of tape in arc shape as you apply.
- Above popliteal space, allow two tape strips to meet.
- Ensure ends are taped without tension, lying one above the other.
- Apply I-tape from heel over popliteal fossa without stretching, overlapping ends of Y-tape.
Recommended product
CatGrips Face & Body Tape
Premium Rayon kinesiology tape — incredibly soft, gentle on sensitive skin, with extra-strong adhesive for a longer-lasting hold. Available in natural skin tone. Ideal for all the applications in this guide.